An alternative encrypted DNS protocol to DNS over HTTPS is DNS over TLS (DoT) (DoH). DoT uses port 853 only for encrypted DNS traffic and runs across a TLS tunnel without any HTTP layering, in contrast to DoH, which treats DNS transmission as just another HTTPS data stream over port 443. Depending on the network situation, this could result in a slight performance boost at the expense of the flexibility that HTTPS-based protocols can offer.
Microsoft released client support for DoH with Windows 11 and Windows Server 2022. The most recent Windows Insider builds now include client support for DoT.
How to evaluate DoT on Insider builds
First things first: install the latest Windows Insider build (25158 or higher). DoT support is not yet available to non-Insider builds of Windows.
Next, configure a DoT-providing DNS resolver as the primary and only resolver (this will ensure no accidental fallback covers up DoT failures). This can be done by following these steps:
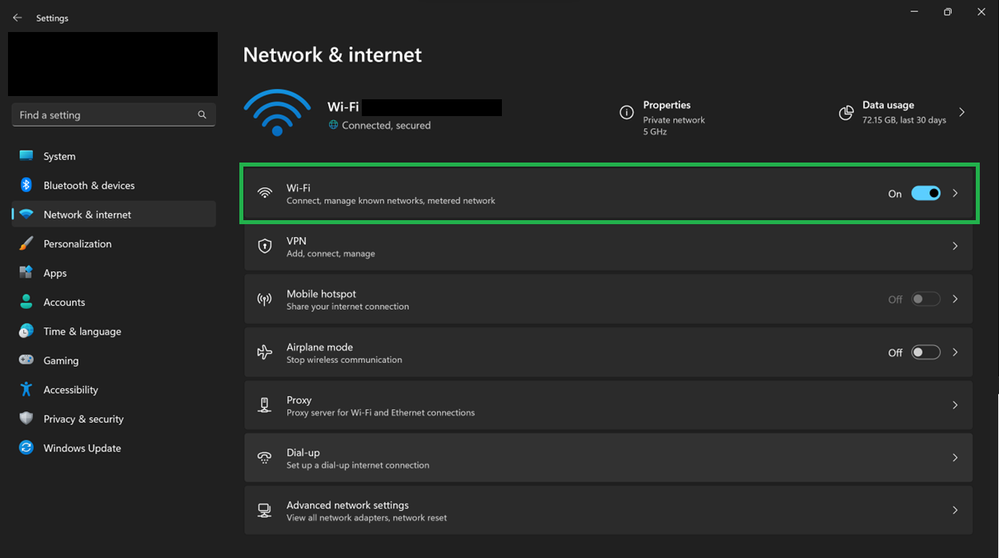
- Go to Settings -> Network (this should load the view for the current default network connection)
- Click on Wi-Fi or Ethernet (likely the top row)
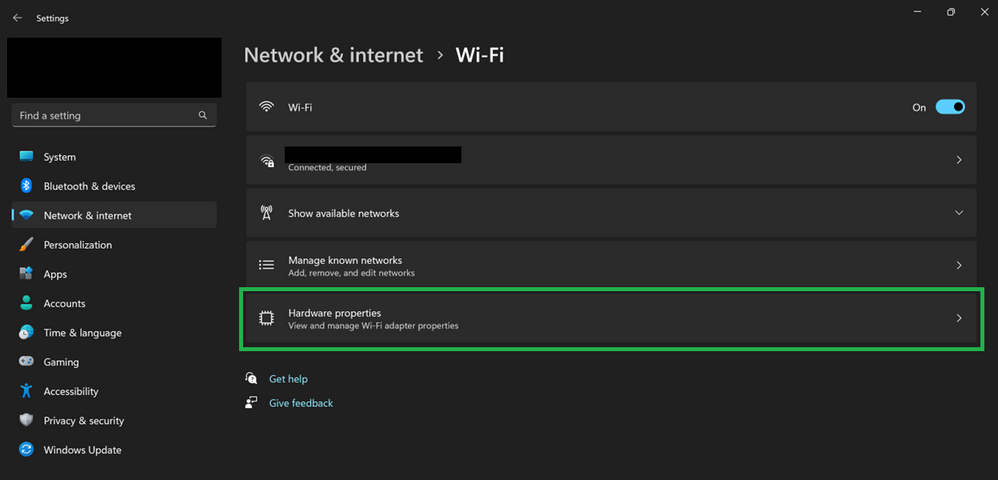
- Click “Hardware properties” (likely the bottom row)
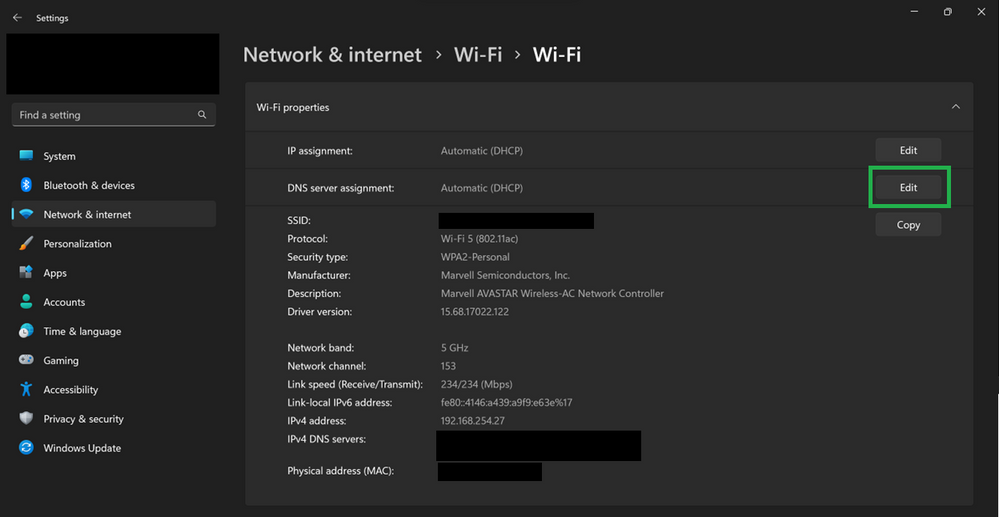
- On the “DNS server assignment:” row, click the “Edit” button
- Turn on the “IPv4” and/or “IPv6” switches
- Type the IP address of the DoT server to test into the “Preferred DNS” text box
- Save and confirm that “<resolver-IP-address> (Unencrypted)” shows up on the “IPv4 DNS servers:” row in the list of configurations near the bottom of this view

Next, in an elevated command line prompt, run the following commands:
netsh dns add global dot=yes
netsh dns add encryption server=<the-ip-address-configured-as-the-DNS-resolver> dothost=: autoupgrade=yes
ipconfig /flushdns
Note that the “dothost” field equal to “:” means that the default DoT port will be used (853) and the domain name presented in the server’s TLS certificate will not be validated. To ensure proper validation of the connection, provide the expected domain name of the DoT server (the connection will use DoT’s designated port 853 without needing to specify it, as custom ports are not supported yet).
These settings should take effect immediately without a reboot. Packet captures should show heavy traffic on port 853 and minimal traffic on port 53.
What to check if it does not work
If this results in a loss of Internet connectivity, here are some things to check to make sure no steps were missed. First, verify the build of Windows supports DoT (DoT is only supported on Insider builds 25158 or later).
Next, run the following command
netsh dns show global
The output should include a line that says “DoT settings: enabled”. If not, re-run this command:
netsh dns add global dot=yes
Next, run this command:
netsh dns show encryption
The output should contain “Encryption settings for <the-IP-address-for-the-configured-DoT-resolver>” with a DNS over TLS host, auto-upgrade set to yes, and UDP fallback set to no. If not, be sure the “netsh dns add encryption” command ran without errors and the parameters correctly specify the properties of the DoT resolver.
Next, review the DNS configuration view to see that the Settings app has the expected DNS resolver configured. Note that even if DoT is working, the text will still say “<resolver-IP-address> (Unencrypted)”; this is expected.
Next, verify the network being used does not perform port 853 blocking and that the resolvers do indeed support DoT. The public resolvers provided by Quad9, Cloudflare, Cisco (OpenDNS), and Google have been tested and are known to work.
If DoT is still not working, connectivity can be restored by changing the configured resolvers or by setting DNS configuration back to automatic to get DNS configuration from the network.